

Are you tired of your old, worn-out leather sofa? Do you want to give it a new look without breaking the bank? Look no further! In this article, we’ll show you how to easily dye your leather sofa at home. Say goodbye to expensive furniture replacements and hello to a refreshed living space.
What Is Leather Dyeing?
Leather dyeing is the process of using dyes or pigments to color or stain leather in order to change or enhance its appearance. This method allows for the personalization of the look of your leather sofa to match your preferences. The process includes:
- Cleaning the leather
- Evenly applying the dye
- Sealing the color with a finish
It is important to select high-quality dyes that are appropriate for the type of leather you have when dyeing leather. Before proceeding, it is always recommended to test the dye on a small, inconspicuous area to ensure compatibility.
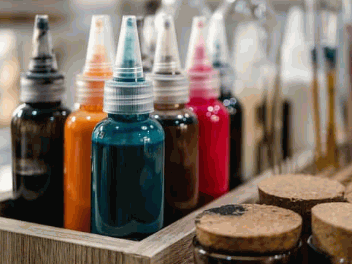
What Are The Types Of Leather Dye?
When it comes to dyeing a leather sofa, there are a few different types of dyes to choose from. Each type has its own unique properties and can produce different results. In this section, we will discuss the three main types of leather dye: water-based, oil-based, and alcohol-based. By understanding the characteristics of each type, you can determine which one is most suitable for your specific leather sofa and achieve the desired outcome.
1. Water-based Dye
Water-based dye is a popular choice for dyeing leather. To prepare the leather, clean it thoroughly to remove any dirt or residue. Then, use a sponge or brush to evenly apply the water-based dye over the leather surface. Allow the leather to dry completely before evaluating the color saturation and considering an additional coat. Once satisfied with the color, seal the dyed leather with a leather finish or conditioner.
2. Oil-based Dye
- Prepare the leather: Ensure the leather is clean and free of any finishes or coatings.
- Application: Use a sponge or rag to evenly apply the oil-based dye onto the leather surface.
- Drying: Allow the dyed leather to thoroughly dry, typically overnight, before using or sealing it.
- Seal the dye: Apply a leather sealant or conditioner to protect the dyed leather and enhance its longevity.
Fact: Oil-based dyes are known for their ability to deeply penetrate the leather, resulting in long-lasting and vibrant color.
3. Alcohol-based Dye
- Make sure the leather is clean and dry before beginning the dyeing process.
- Apply the alcohol-based dye using a sponge or brush, working in small sections for even coverage.
- Allow the first coat of dye to dry completely before applying any additional coats if necessary.
- Protect the color and finish of the dyed leather by sealing it with an appropriate leather sealer.
- When using alcohol-based dye, be sure to wear gloves and work in a well-ventilated area.
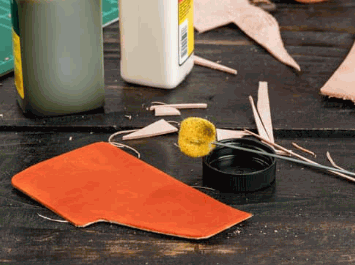
What Are The Materials Needed To Dye A Leather Sofa?
Before beginning the process of dyeing your leather sofa, it is important to gather all the necessary materials. These items will ensure that the dye adheres properly and that the leather is fully prepped for coloring. In this section, we will discuss the essential materials needed for dyeing a leather sofa, including leather dye, leather cleaner, a sponge or brush, gloves, and cloth or paper towels. By having these supplies on hand, you can achieve a professional-looking dye job that will revitalize your leather sofa.
1. Leather Dye
Leather dyeing is the process of adding color to leather surfaces to enhance or restore their appearance. To begin, thoroughly clean the leather using a leather cleaner and a sponge or brush.
Next, mix the leather dye according to the instructions provided by the manufacturer and test it on a small, inconspicuous area of the sofa. Apply the dye evenly in thin layers, allowing each layer to dry before adding the next. Once the final coat is applied, allow the dye to dry completely before using a leather conditioner to protect the newly dyed surface.
For optimal results, always carefully follow the instructions provided by the dye manufacturer and consider seeking professional assistance for larger or more intricate dyeing projects.
2. Leather Cleaner
- Choose a high-quality leather cleaner, specifically designed for the type of leather on your sofa, such as Lexol pH-balanced cleaner.
- Apply the leather cleaner onto a sponge or cloth and gently wipe the sofa in a circular motion to effectively remove dirt and stains.
- Use a separate clean cloth to wipe off any excess cleaner and allow the sofa to dry completely before use.
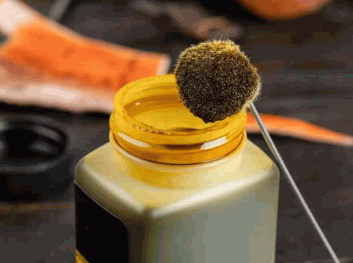
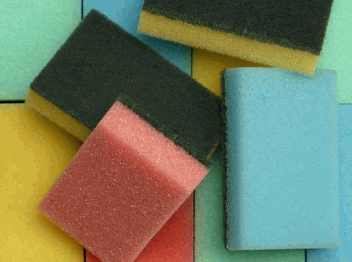
3. Sponge Or Brush
- For leather dye application, use a sponge for larger surface areas, ensuring even coverage.
- When working on intricate details or corners, a brush is ideal for precise dye application.
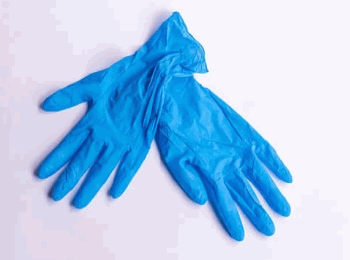
4. Gloves
- Wear gloves to protect your hands from dye and chemicals.
- Choose durable and chemical-resistant nitrile or rubber gloves.
- Ensure a snug fit to prevent dye from seeping through.
- Replace gloves if they tear or puncture during the dyeing process.
- Properly dispose of used gloves to prevent contamination or skin irritation.
5. Cloth Or Paper Towels
- For best results, use a clean, dry cloth or paper towels to carefully wipe off any excess dye from the surface of the leather.
- Gently dab the cloth or paper towels onto the dyed areas to absorb any remaining dye.
- Repeat this process until no more excess dye transfers onto the cloth or paper towels.
Fun fact: When using cloth or paper towels for dyeing a leather sofa, it is essential to ensure they are clean and free of lint to avoid leaving any unwanted residue on the dyed surface.

How To Dye A Leather Sofa?
Are you looking to give your old leather sofa a new look? Dyeing your leather sofa can be a cost-effective and fun way to revamp your furniture. In this section, we will walk you through the step-by-step process of dyeing a leather sofa. From cleaning and preparing the leather to applying the dye and sealing it for long-lasting results, we’ve got you covered. So, let’s dive into the process and transform your leather sofa into a stylish piece of furniture.
Delve into: How Much Does It Cost To Dye A Leather Couch
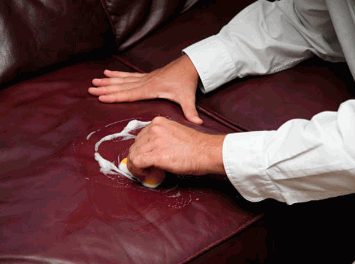
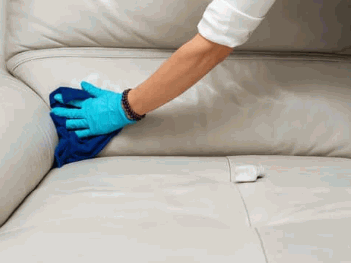
Step 1: Clean The Sofa
- Remove dust and debris from the sofa using a vacuum cleaner with a brush attachment.
- Prepare a cleaning solution by mixing mild soap with water.
- Dip a soft cloth into the soapy solution and wring out excess liquid.
- Gently wipe the sofa with a damp cloth to remove dirt and stains.
- Use a separate damp cloth to wipe off any remaining soap residue.
- Allow the sofa to air dry completely before moving on to the dyeing process.
Step 2: Prepare The Dye
- Gather the necessary materials including leather dye, leather cleaner, sponge or brush, gloves, and cloth or paper towels.
- Read the manufacturer’s instructions and guidelines for preparing the specific type of leather dye in Step 2.
- Ensure the dye is thoroughly mixed and any required additives are properly incorporated according to the manufacturer’s instructions.
- Prepare the dye in a well-ventilated area and protect the surrounding surfaces from potential spills or splatters.
Step 3: Test The Dye
- Prior to applying the dye to the entire leather sofa, it is important to perform a patch test in a hidden area to confirm that the color and finish meet your expectations.
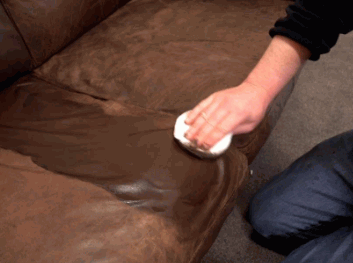
Step 4: Apply The Dye
- Prepare the dye mixture according to the manufacturer’s instructions.
- Use a sponge or brush to apply an even layer of dye to the leather sofa.
- Work in small sections, ensuring thorough and consistent coverage.
- Step 4: Apply the Dye
- Apply additional coats as needed to achieve the desired color depth and intensity.
- Allow the dye to dry completely before proceeding to the next step.
Step 5: Let The Dye Dry
- After applying the dye, make sure to let the leather sofa air dry for at least 24 hours to allow the dye to be properly set.
- During this drying period, it is important to avoid sitting on or using the sofa to prevent any smudging or uneven coloring.
- For faster drying, place the sofa in a well-ventilated area with proper air circulation.
- Carefully inspect the sofa to ensure that the dye has dried evenly before applying additional coats or sealing.
Step 6: Apply A Second Coat
- Clean the leather surface to remove any residue and allow the first coat to dry completely.
- Prepare the dye mixture for the second coat, ensuring consistency and color matching with the first coat.
- Apply the second coat of dye evenly and lightly, focusing on any areas that may need additional color.
- Step 6: Apply a Second Coat (Optional)
- Allow the leather to dry completely before considering an optional third coat or applying a sealant.
In the early 1800s, the process of leather dyeing evolved significantly with the introduction of aniline dyes, marking a major shift in the leather industry’s approach to coloring leather goods.
Step 7: Seal The Dye
- Clean the dyed area to remove any excess dye or residue.
- Allow the leather to dry completely before sealing the dye.
- Choose a suitable leather sealer or finish to match the dye type, like a water-based sealer for water-based dye.
- Apply a thin, even layer of the sealer using a clean sponge or cloth.
- Let the sealer dry completely before using the leather sofa.
- For best results, follow the manufacturer’s instructions for the specific dye and sealer used.
What Are The Tips For Dyeing A Leather Sofa?
Dyeing a leather sofa can be a cost-effective way to give new life to an old piece of furniture. But before you dive into the process, it’s important to know some key tips to ensure the best results. In this section, we’ll cover five important tips for dyeing a leather sofa. From choosing the right shade to protecting surrounding areas, these tips will help you achieve a professional-looking finish. So let’s get started!
1. Use A Lighter Shade Than Desired
- For best results when dyeing a leather sofa, consider using a shade that is slightly lighter than your desired color. This is because leather tends to absorb dye differently than expected, and using a lighter shade accounts for its natural characteristics.
When dyeing a leather sofa, opt for a dye shade that is slightly lighter than your desired color to account for the leather’s natural characteristics. This approach ensures that the final color matches your expectations after the dyeing process.
2. Test The Dye On A Small Area First
- Start by cleaning the leather surface with a leather cleaner.
- Next, identify a small and inconspicuous area on the sofa to test the dye.
- Apply a small amount of the dye to the test area and observe how it dries and adheres to the leather.
- Check for any unexpected reactions between the dye and the leather.
- Evaluate the color and coverage of the test patch before proceeding to dye the entire sofa.
3. Apply Dye In Thin Layers
- Prepare the leather: Clean the surface and ensure it’s dry.
- Apply the dye: Use a sponge or brush to apply a thin, even coat of dye.
- Allow drying: Let the first layer dry before applying additional coats.
- Repeat the process: Apply subsequent thin layers until the desired color is achieved.
Fact: To achieve the best results, it is recommended to apply dye in thin layers to ensure even color absorption and prevent over-saturation.
4. Protect Surrounding Areas
- Cover nearby floors and furniture with protective drop cloths or plastic sheeting to prevent any damage.
- Use painter’s tape to secure the protective covering and prevent any accidental dye spills.
- Ensure adequate ventilation in the dyeing area to minimize the spread of fumes and protect surrounding areas.
- Wear old or protective clothing to shield against accidental splatters or spills while working.
5. Use A Leather Conditioner After Dyeing
- After dyeing, use a clean, dry cloth to evenly apply a leather conditioner onto the sofa.
- Gently buff the sofa with a soft, dry cloth to remove any excess conditioner and achieve a smooth finish.
- To maintain the leather’s suppleness and prevent cracking, repeat the conditioning process every six months.
Fact: Leather conditioners not only moisturize the leather, but also protect against drying, cracking, and fading.