

In the world of home improvement, plastering plays a crucial role in achieving smooth and polished walls. Whether you’re tackling a DIY project or hiring a professional, understanding the tools and materials needed for plastering is essential for a successful outcome.
In this comprehensive guide, we will delve into the fundamental aspects of plastering, including the necessary tools such as trowels, plastering hawks, and plasterer’s floats, as well as the essential materials such as plaster, water, and sand. We will also explore the step-by-step process of plastering a wall, from wall preparation to applying the final coat and smoothing the surface. We’ll highlight common mistakes to avoid when plastering, ensuring that you achieve a flawless finish.
So, whether you’re a novice or a seasoned DIY enthusiast, this article will equip you with the knowledge and insights to master the art of plastering.
What Is Plastering?
Plastering is the process of applying a smooth, seamless finish to a surface, commonly used to repair rough, uneven walls or cover cracks and holes.
Various techniques are utilized in the art of plastering to achieve a flawless texture. One common approach involves using a trowel to spread a plaster mix evenly across the surface, ensuring any imperfections are filled. Another method is known as skimming, where a thin layer of plaster is applied to create a smooth, uniform appearance. Often, specialized tools such as feather edges and finishing trowels are employed to refine the surface further, smoothing out any remaining irregularities. These techniques are instrumental in achieving a visually appealing, structurally sound finish.
Discover: How To Repair Cracks In Plaster
What Are The Tools Needed For Plastering?
A successful plastering project requires a set of essential tools, including a trowel, plastering hawk, plasterer’s float, plastering brush, bucket, mixing paddle, jointing knife, and a straight edge for precise application and finishing.
Each tool plays a specific role in the plastering process.
The trowel is essential for applying and smoothing the plaster onto surfaces, ensuring a seamless and even finish.
The plastering hawk provides a convenient platform for holding and accessing the plaster, making it easier to work with.
A plasterer’s float is used to level and smooth the plaster, while the plastering brush helps in blending and texturing the plaster for decorative effects.
The bucket is used for mixing the plaster, and the mixing paddle aids in achieving the right consistency of the plaster mixture.
A jointing knife is essential for creating neat and precise joints between plasterboards or panels, contributing to a polished overall look.
The straight edge is crucial for ensuring a uniform and level application of plaster across surfaces, resulting in a professional finish.
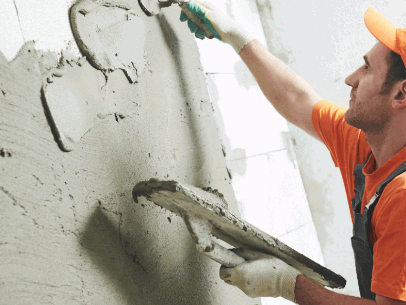
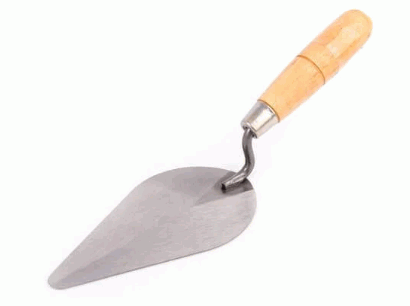
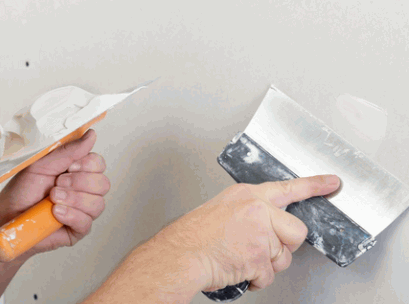
Trowel
The trowel is a fundamental tool in plastering, used to apply and smooth the plaster coats evenly across the surface, ensuring a seamless finish.
Its importance lies in its ability to achieve a smooth and even coat, crucial for a professional and polished appearance in plastering. The correct application technique involves holding the trowel at a slight angle and using a sweeping motion to spread the plaster evenly. The trowel’s shape and material also play a significant role, with steel trowels allowing for precise finishing and plastic trowels ideal for applying initial coats. When used skillfully, the trowel ensures that the plaster adheres uniformly, eliminating imperfections and creating a flawless surface ready for further treatment.
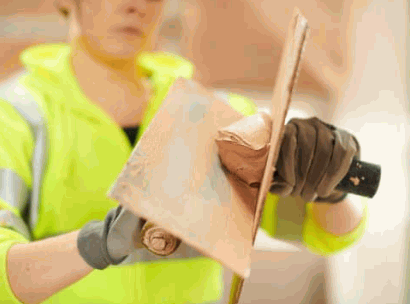
Plastering Hawk
A plastering hawk is an essential tool for mixing and applying plaster, providing a stable platform for the plaster and facilitating its transfer to the trowel for smooth, efficient application.
Designed with a flat surface and a handle, the plastering hawk enables tradespeople to mix and hold a small amount of plaster, making it easily accessible for quick application. Its lightweight design allows for convenient maneuvering while working on ceilings and walls.
The hawk works in tandem with the trowel, allowing for a swift transfer of the plaster from the hawk to the trowel, ensuring a seamless and even coating.
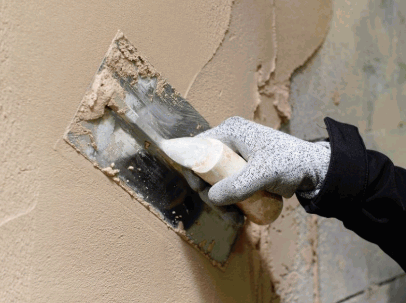
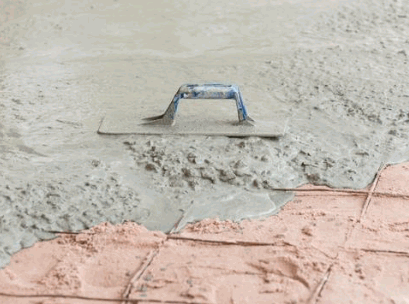
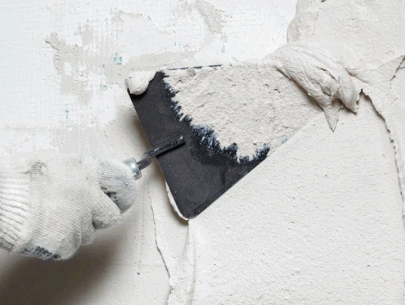
Plasterer’s Float
The plasterer’s float is a vital tool for smoothing and applying the initial coat of plaster, ensuring an even and consistent surface for further trowel work and finishing.
It plays a crucial role in creating a seamless transition between old and new plaster, minimizing imperfections by leveling the applied material. The float’s flat surface enables the plaster to be spread evenly, preventing uneven drying and cracking. It helps in achieving a uniform texture, necessary for a polished appearance. The use of the float is instrumental in creating a professional and refined finish that meets high standards of craftsmanship in plastering work.
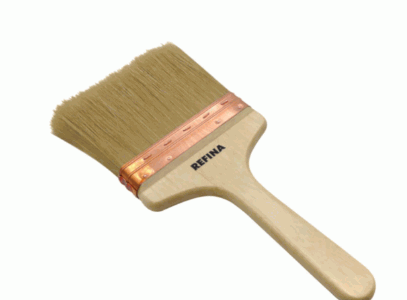
Plastering Brush
The plastering brush is utilized for cleaning up the work area, preparing the surface, and ensuring a pristine environment for the plastering process.
By effectively removing debris and dust from the surface, the brush facilitates the proper adhesion of plaster, leading to a smoother and more professional finish. Its bristles are designed to be durable and efficient, enabling thorough cleaning without leaving behind any residue.
The use of a plastering brush contributes to a tidy and organized workspace, essential for a successful plastering job. Its ergonomic handle and lightweight construction ensure ease of use, reducing fatigue during extended periods of cleaning and surface preparation.
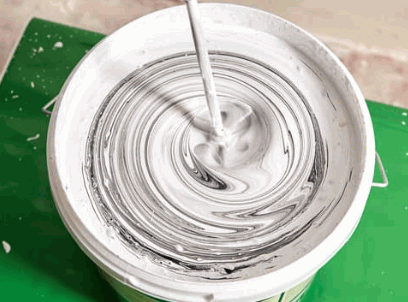
Bucket
The bucket is employed for mixing plaster and other materials, serving as a convenient container for preparing the necessary mixtures for the plastering process.
Its sturdy construction and ample capacity make it an essential tool for tradespeople and DIY enthusiasts alike. The bucket allows for easy blending of various components, ensuring a uniform and well-mixed plaster compound. Its ergonomic handle ensures comfortable handling during the mixing process, while its durable material can withstand the demands of heavy stirring. The wide opening of the bucket facilitates effortless pouring and scooping of the mixed plaster, streamlining the application process. Whether it’s for small repairs or large-scale projects, the bucket plays a pivotal role in achieving a consistent and high-quality plaster mixture.
Mixing Paddle
The mixing paddle is a crucial tool for blending plaster and other materials effectively, ensuring the homogeneous mixture required for the plastering application.
Its primary role is in material preparation, as it facilitates the thorough incorporation of water and plaster, preventing clumps or air pockets. The design of the mixing paddle is specifically intended to create a well-blended mix, eliminating the risk of weak spots or inconsistent texture in the plaster. By swiftly and evenly dispersing the components, it results in a uniform consistency, essential for achieving a smooth and uniform application onto the surface being worked on. The mixing paddle is also instrumental in minimizing waste and optimizing the use of materials, contributing to cost-efficiency in plastering projects.
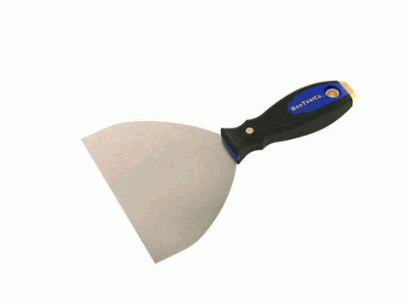
Jointing Knife
The jointing knife is utilized for smoothing and applying plaster coats in tight or intricate areas, complementing the role of the trowel in achieving a seamless finish.
Its slender and flexible blade allows for precise application of plaster in narrow corners and crevices, ensuring a consistent and level surface. Smoothing out imperfections and air pockets, the jointing knife is indispensable for achieving a flawless result. Whether it’s around electrical outlets, windows, or other tricky spots, this tool excels in providing a professional touch to the plastering process.
Straight Edge
The straight edge is essential for ensuring an even and level surface during the plastering process, contributing to the overall quality and consistency of the finish.
It plays a crucial role in determining the integrity of the plastered surface, as it enables the contractor to create a smooth and uniform result. Without the straight edge, achieving the desired flatness and alignment would be significantly challenging, potentially leading to visible imperfections. By using the straight edge, plasterers can detect dips, high spots, or uneven areas, allowing them to make necessary adjustments for a flawless outcome.

What Are The Materials Needed For Plastering?
Plastering requires specific materials such as plaster, water, and sand, in addition to preparation essentials like primer and color for a seamless and durable finish.
Plaster plays a crucial role as the main binding agent, creating a smooth and even surface for painting or decoration. The right proportions of water and sand are essential for achieving the ideal consistency and strength of the plaster mixture.
Primer is vital to ensure proper adhesion between the plaster and the surface, enhancing durability and longevity. The choice of color is significant as it contributes to the aesthetics of the finished plaster surface, while also adding a layer of protection. Applying a suitable primer before the color coat helps in achieving a uniform and long-lasting finish.
Plaster
Plaster serves as the primary material for creating the smooth, durable coat applied to surfaces, playing a pivotal role in achieving the desired finish for plastering projects.
As the foundational material for plastering, plaster offers several key advantages. It creates a level and uniform surface, concealing imperfections and providing an excellent base for paint or wallpaper. Additionally, plaster enhances the thermal performance of walls and ceilings, contributing to energy efficiency. Its breathability also helps regulate moisture, preventing mold and mildew. The quality of plaster significantly impacts the overall appearance and longevity of the surface, making it an indispensable component of any plastering endeavor.
Water
Water is a crucial component in the plastering process, used for mixing with plaster and other materials to achieve the desired consistency and smooth application.
Proper water ratio is essential to ensure the right binding and adhesion of the plaster to the surface, preventing cracks and ensuring durability. The addition of water also affects the drying time, workability, and final strength of the plaster. Too much or too little water can result in an inconsistent mixture, leading to difficulties in application and compromised quality.
Sand
Sand is an essential ingredient in plaster mixtures, contributing to the smooth texture and finish of the applied coats, ensuring durability and an even surface.
Its granular nature provides stability to the plaster mix, preventing shrinkage and cracks. In addition, the sand grains create a bonding effect, enhancing the adhesive properties of the plaster. The varied sizes and shapes of sand particles aid in creating a cohesive mixture, facilitating easy application and enhancing overall workability.
PVA Bonding Agent
The PVA bonding agent is utilized to prepare surfaces for plastering, enhancing adhesion and providing a suitable base for the application of plaster and primer.
It plays a crucial role in ensuring that the plaster or primer adheres firmly to the surface, creating a strong and durable bond. Its functionality lies in promoting adhesion between the existing substrate and the new material being applied, facilitating a smooth and even finish. The PVA bonding agent also helps to minimize the risk of cracking or peeling, thus improving the longevity of the plaster or primer coating.
Plastering Beads
Plastering beads are specialized components used to reinforce corners and edges, ensuring structural integrity and a clean, professional finish for plastered surfaces.
These beads are designed to create straight, crisp edges and prevent damage from impact or movement. This helps to maintain the durability of the plastered surface, especially in high-traffic areas. Additionally, plastering beads play a crucial role in achieving a smooth and professional appearance, as they guide the application of plaster and ensure consistent thickness. Whether it’s a wall, ceiling, or corner, these beads provide essential support and enhance the overall aesthetics of the plastered area.

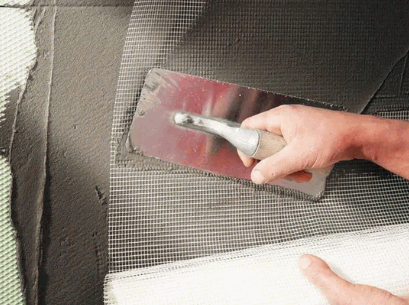
Plastering Mesh
Plastering mesh is employed to address issues such as cracks and moisture damage, providing structural support and reinforcement for surfaces undergoing repair and restoration.
It serves as a crucial component in remedying structural imperfections, offering a durable solution to prevent further deterioration. The mesh effectively distributes load, reducing the risk of cracking and enhancing the overall stability of the surface. It acts as a barrier against moisture ingress, safeguarding the integrity of the structure. Its versatility extends to various applications, including:
- plastering
- stucco application
- and concrete repair.
How To Plaster A Wall?
Plastering a wall involves a series of steps, including surface preparation, applying the plaster coats, skimming, and using a float to achieve a seamless, even finish, effectively covering rough surfaces, cracks, and holes.
Surface preparation is a critical initial step in achieving a flawless plaster finish. It involves cleaning the surface, removing any loose material, and applying a PVA bonding agent to promote adhesion.
When applying plaster coats, it’s essential to work methodically, ensuring even coverage and proper thickness. Skimming, or the final coating, demands skill and precision to achieve the desired smoothness. Using a float during the plastering process helps to create a level surface and eliminate imperfections. Employing these techniques results in a professional-looking wall that conceals any underlying flaws.

Prepare The Wall
Preparing the wall is crucial in plastering, involving surface repair, addressing moisture issues, and applying primer to create a suitable base for the plaster coats.
Surface repair is essential to fix any cracks, dents, or imperfections, ensuring a smooth and even substrate for the plaster application. Addressing moisture issues is vital to prevent future damage to the plastered surface, requiring proper mitigation through sealants or moisture barriers. The application of primer serves as a crucial step, enhancing adhesion and promoting an even absorption of the plaster material, resulting in a durable and long-lasting finish.
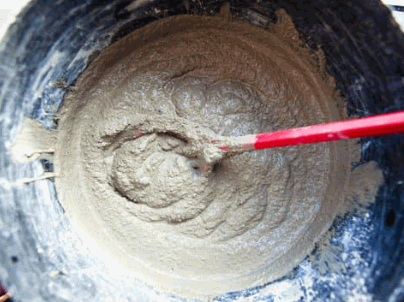
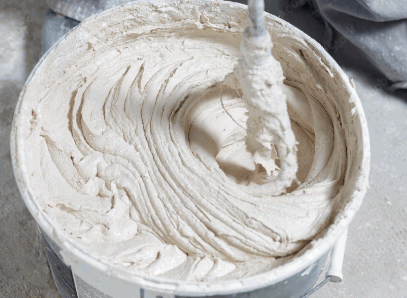
Mix The Plaster
Mixing the plaster involves combining the necessary materials such as plaster, water, and sand to achieve the desired smooth and workable consistency for application.
The plaster is carefully measured out to ensure the correct ratio of water and sand. Proper measurement is essential to achieve the desired consistency. Once the plaster is in the mixing container, water is gradually added while continuously stirring to prevent lumps and ensure an even distribution.
After achieving the initial mix, sand is added to the mixture, further enhancing the structural integrity and workability of the plaster. The mixing process requires patience and attention to detail to reach the right balance of materials for a smooth and easily applied texture.
Apply The First Coat
Applying the first coat of plaster involves covering the surface, addressing rough areas, and ensuring evenness and levelness to create a solid foundation for subsequent coats.
When applying the first coat of plaster, it’s crucial to maintain a consistent thickness throughout the surface. One technique to achieve this is by using a hawk and trowel to spread the plaster evenly, working in small sections to avoid inconsistencies. Focusing on smoothing out any imperfections, such as bumps or ridges, will contribute to creating a flawless base for the following layers. Careful attention to detail and a steady, consistent hand are essential for ensuring a level and uniform application.
Apply The Second Coat
Applying the second coat of plaster is essential for achieving a smooth, even finish, ensuring seamlessness and a high-quality appearance for the plastered surface.
The second plaster coat plays a crucial role in smoothing out any imperfections or irregularities left after the first coat application. It provides an opportunity to fill in any gaps or uneven areas, creating a uniform surface that enhances the aesthetic appeal of the space. Additionally, proper drying of the second coat is essential to avoid cracks and ensure the long-term durability of the plaster. This phase is pivotal in the plastering process, as it sets the foundation for the final surface treatment and ultimately contributes to the overall longevity of the finish.
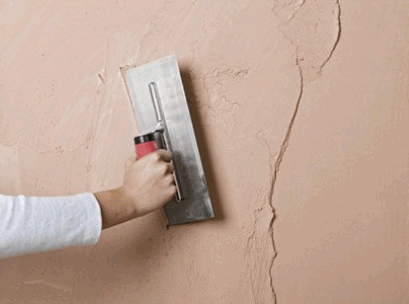
Smooth The Surface
Smoothing the plastered surface requires precise trowel techniques, ensuring a flawless finish and addressing any imperfections to achieve the desired result.
Using the trowel in a smooth, steady motion is essential to avoid creating uneven patches or ridges. Skillful application of pressure and angle is key to achieving uniformity across the surface. Feathering the edges with a light touch helps to blend the plaster seamlessly and eliminate any sharp lines. Taking the time to regularly clean and maintain the trowel ensures that it remains an effective tool for achieving a smooth and polished plaster finish.
Clean Up
Cleaning up after plastering involves organizing tools and materials, clearing the work area, and ensuring a tidy, unobstructed surface for the cured plaster.
Effective post-plastering cleanup is crucial to the overall success of the project. Proper organization of tools and materials not only promotes efficiency but also ensures safety by preventing accidents caused by cluttered workspaces. A clean, clear surface is essential for achieving a smooth and uniform finish. A tidy work area facilitates a more productive environment and helps prevent the spread of dust and debris to other parts of the property, promoting a clean and professional result.
What Are The Common Mistakes To Avoid When Plastering A Wall?
Plastering a wall requires careful attention to detail to avoid common mistakes such as uneven application, improper finish, and inadequate preparation, whether for DIY projects or professional renovations and repairs.
One of the most common mistakes in plastering is applying an uneven coat, leading to a bumpy and unattractive finish. To prevent this, it’s essential to take your time and ensure an even spread of plaster across the entire surface, using smooth, consistent strokes.
Another mistake to watch out for is an improper finish, which can result in visible lines, rough patches, or an uneven texture. Professionals often use a wet sponge or trowel to achieve a smooth and seamless surface, but DIY enthusiasts can also achieve this by paying attention to the drying time and using the right tools.
Inadequate preparation, such as failing to prime the surface or neglecting to repair cracks and imperfections, can also lead to subpar results. Properly preparing the wall by filling in cracks, sanding rough areas, and priming the surface sets the foundation for a successful plastering job.